Support
To manage your site’s media, click the Media link in the upper right hand corner of the workspace.
Media Manager Tour
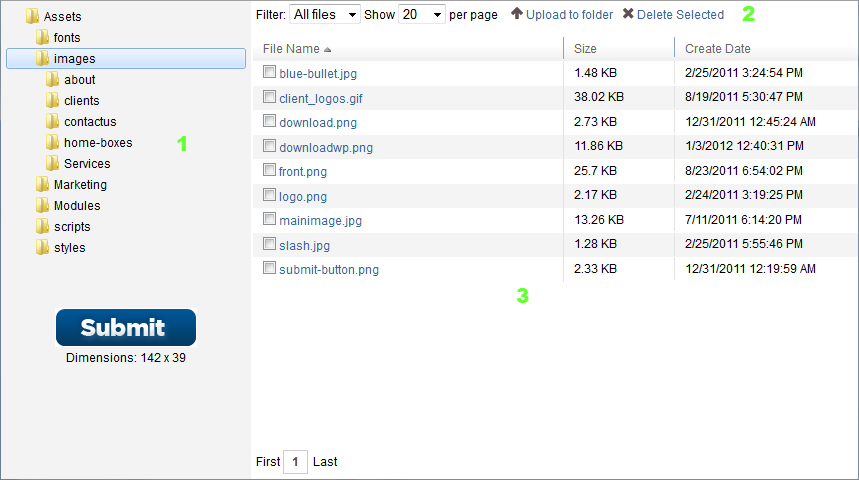
1. Tree view of folders
“Assets” is the top level and represents the root of your domain. For example, if a file called submit-button.png is in the folder path /Assets/images/ then the image can be accessed at www.yourdomainname.com/images/submit-button.png
To add a folder at any level, select a folder, right click and select “Add Folder”. Only available for media administrators.
To add a private folder at any level, select a folder, right click and select “Add Private Folder”. Any media in private folders are not accessible on the website. Private folders serve as a storage folders for use by modules. Only available for media administrators.
The “Modules” folder in the root folder cannot be deleted/ renamed and is a designated folder for 3rd party modules to store any packaged assets.
A folder named “Admin” is not allowed to be added in the root folder.
2. Actions and options for the currently selected folder
Filter:
- All – all file types.
- Images - .jpg, .jpeg, .gif, .bmp, .png file types.
- Media - .flv, .wmv, .mov, .rm
Show per page: The number of files to show on the results page.
Upload to Folder: Opens an upload tool. Duplicate files are not allowed in a single folder. Files name “web.config” are not allowed in any folder. Only available for media administrators.
Delete Selected: Deletes the selected files from the current folder. Proceed with caution as files cannot be restored after deletion. Only available for media administrators.
3. List of files in the currently selected folder
Selecting an image file will show a preview along with image dimensions. If the current user is a media administrator, then check boxes will appear for deletion purposes. For .txt, .css, .js, .html, .htm, .xml, .cshtml file types, an edit icon will appear for media administrators next to each respective file when hovered. Clicking the edit icon will allow the media administrator to edit the file directly.
If the Media Manager was opened from an editor that expects a selection to be made, then a plus icon will appear next to each hovered file link. Clicking the icon will insert the file path into the originating editor.